Miro
Miro is a cloud-based collaboration tool. The tool features a digital whiteboard that can be used for research, ideation, building customer journeys and user story maps, wireframing and a range of other collaborative activities.
Hike One policy for using Miro (sharing with clients)
To keep our work private when sharing boards with clients a couple of things need to be taken into account. When you work on a project where you will be using Miro with clients or other parties, ask your Project Manager to get you started.
There are 2 ways to work together with clients in Miro.
-
Work together within a Miro Team: use for longer projects that need multiple boards.
👉 Ask your Project Manager to set up your Miro project.\- + Clients will only have access to the boards within the Miro team you create.
- + Cursors show names, easy for the facilitator.
- + Overview of all project boards within the team, convenient when using multiple boards within the project.
- - Check if the client needs to use the board for more than 5 days (a bit of administration)\
- + Clients don’t need to create an account.
- + Free
- + Clients will never see the board or contact information of other clients.
- - No names near the cursors.
- - No overview of all the boards within the project.
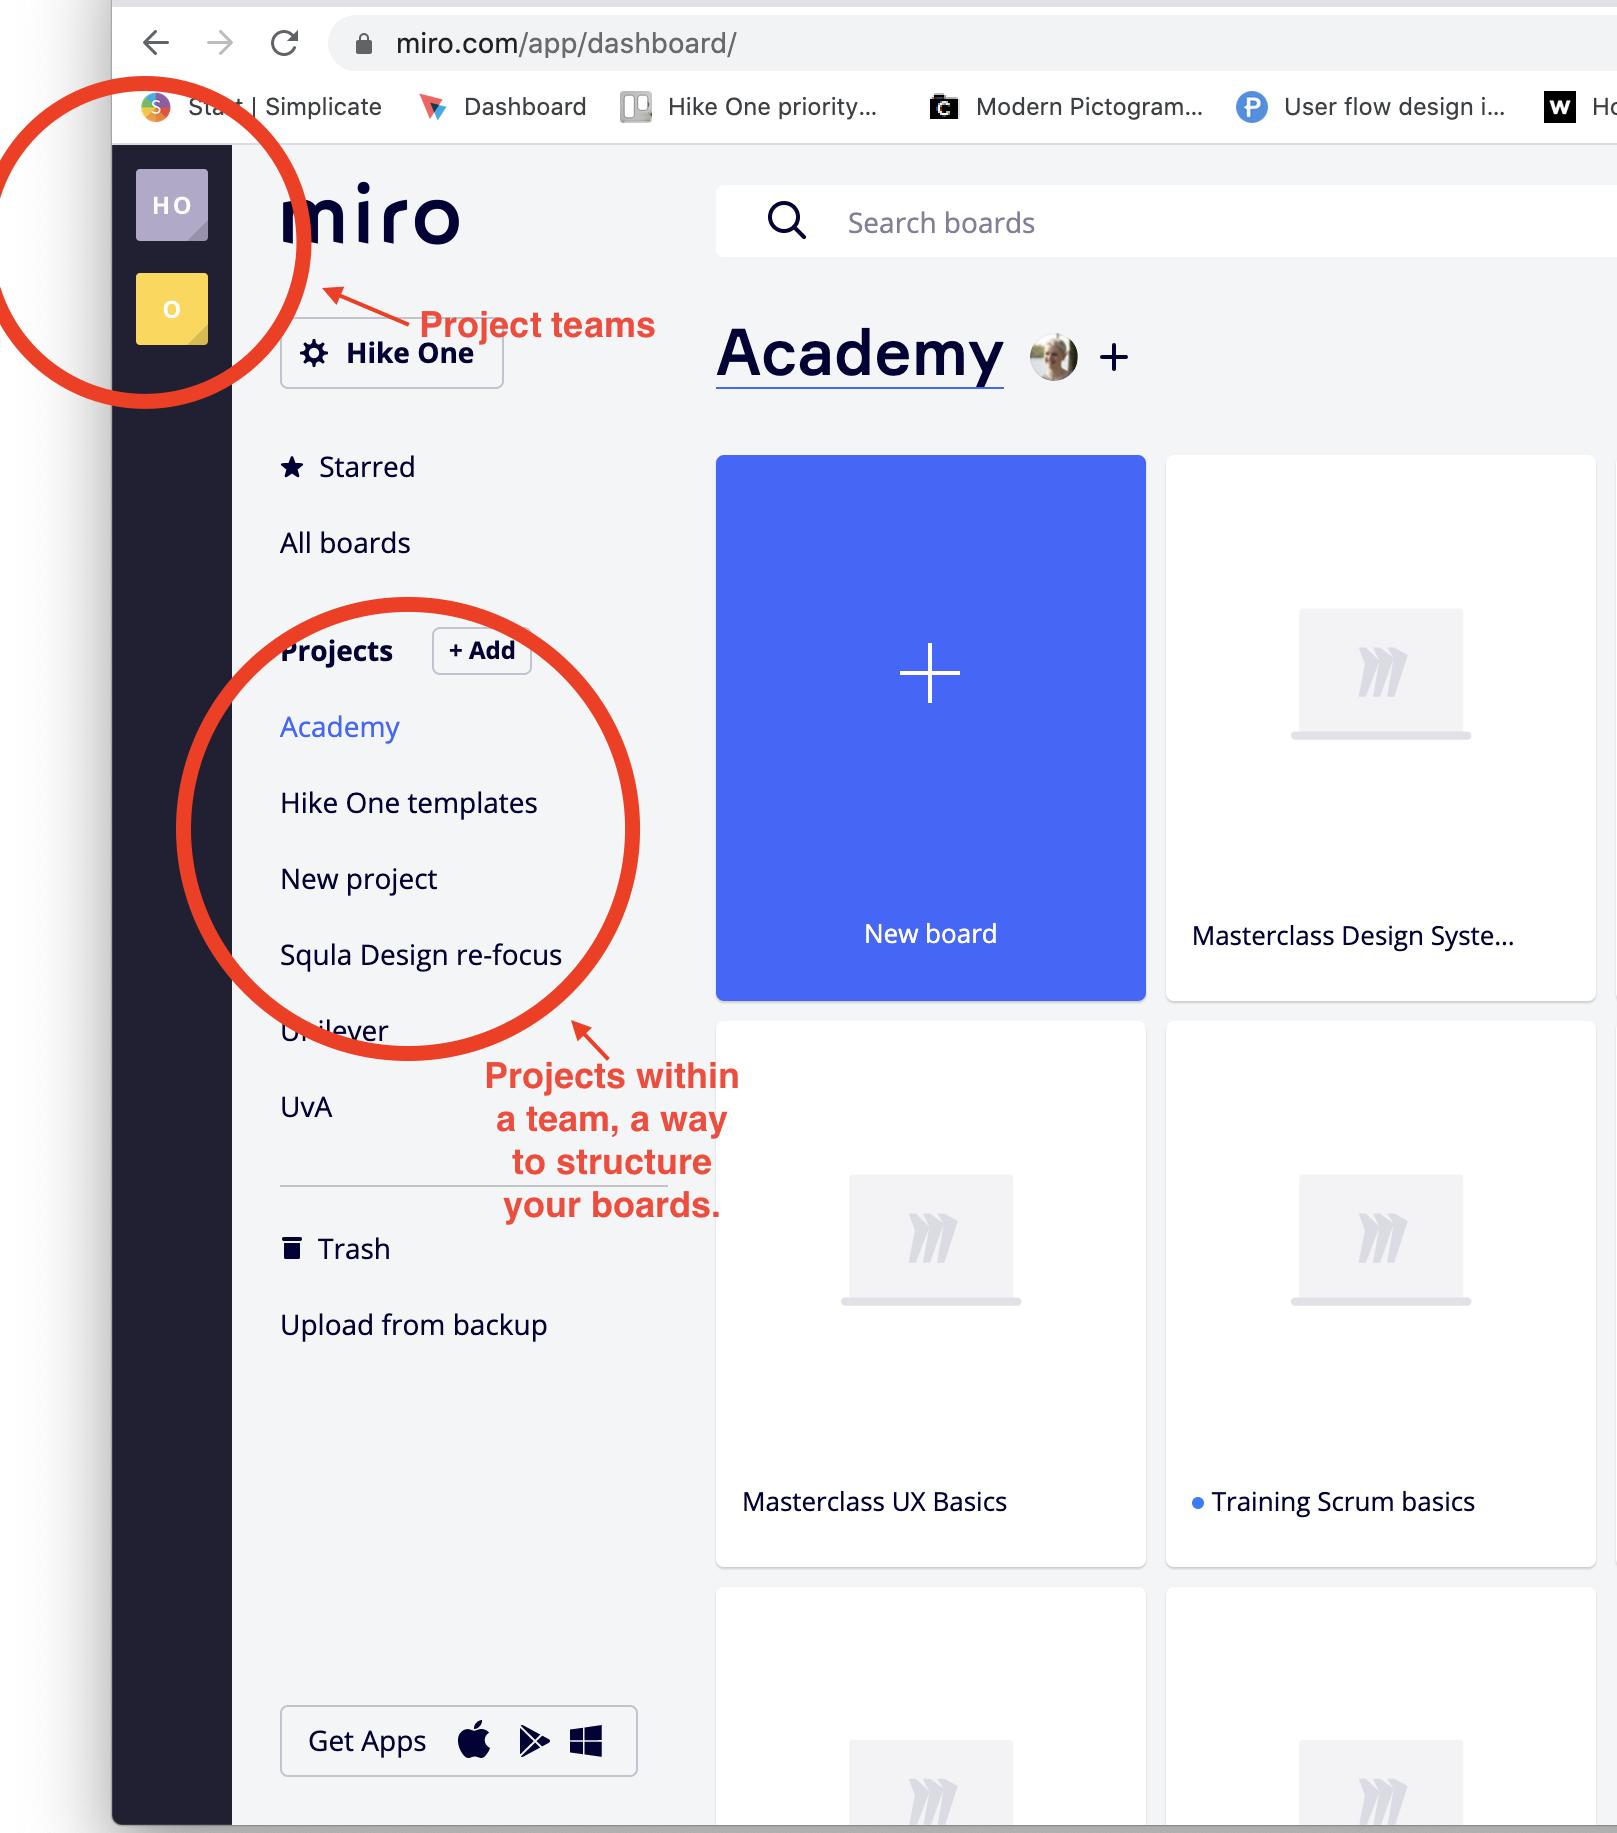
Creating a Miro project team
A Project Manager or Miro Admin can create a project team. This prevents our clients from ever seeing all Hike One project boards and other client’s contact information.
-
Create a new team: https://miro.com/app/settings/company/3074457347815145420/teams
 \
\ -
Add Hikers to the team
Invite Hikers from the Hike One team or add them via the email-address as an occasional user. If you need to use the Miro boards 5 days in a row or more, add them as a full-license team member.
Add clients to the team
If clients will use the boards for less than 5 days in a row add them as an occasional user (this saves some 💰). If they need to use it for more than 5 days in a row they can be added as a full licensed user. Just make sure to remove them once a project is done. This way we only pay for the days they use it.

3. Check if your project team is added to the sidebar on the left side of your screen.
4. Create your Miro board and continue with Sharing your Miro board
Sharing your Miro board
1. Invite your team to the Miro board
You have different options:

Anyone at the team - Only do this in case of having a project team
This means it will be shared with ALL people you have added to the projectteam, they will be able to see all the contents of that team and who is in it. So make sure you have a separate project team created before you invite them to the board!
Anyone with the link
This is an option to invite clients, they will not need an account or anything to view/edit the board. This is the best option for inviting clients IF you don’t need to know which person is which cursor in the board.
Adding email addresses
You can add email addresses to invite people to the board. This means that the invited people are able to view or edit the board. Anyone else in the team will need to ask for access. When inviting people from the outside, make sure you only grant them access to this board and not the Hike One team.
My project is done, now what?
Once you are done using Miro, make sure you:
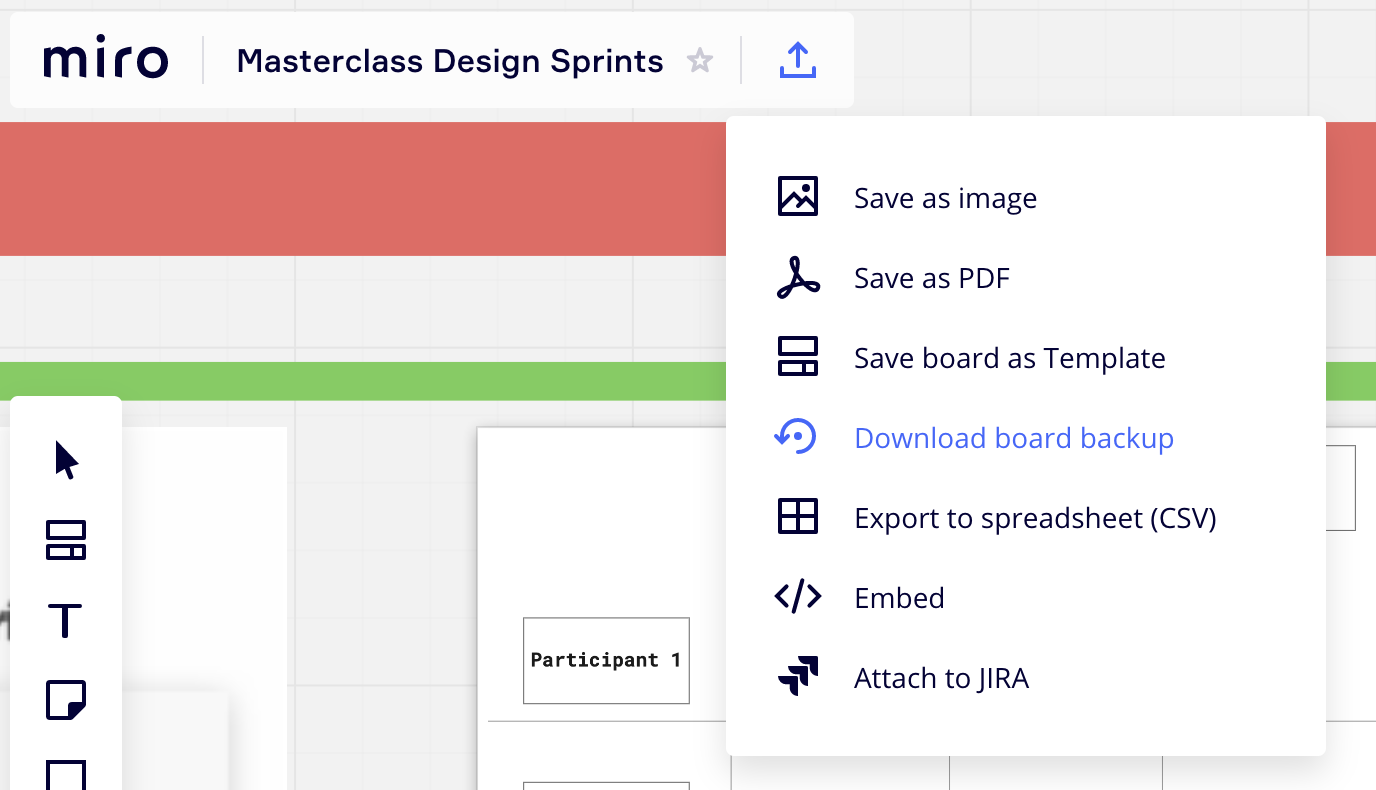
- back-up your Miro board (this will create a download which you can add to your dropbox folder).
- Remove the project team & external team members.